A recent visit to brow expert Lucy R. confirmed what I’d suspected for some time now: Not only are my eyebrows disproportionately shaped; they’re also not even on the same level. They share completely separate longitudinal coordinates. If my eyebrows were trains featured in a math problem about intersection, they’d just run perpetually parallel past each other while waving goodbye. Which is why I’m now in what Lucy lovingly calls “brow rehab,” hoping to fix this issue once and for all. But until then, as my brows are slowly grown in and guided back to where they once were, I’ll be faking the perfect shape with the help of a few tools. Read on for an easy step-by-step tutorial on how to properly fill in your brows.
Here’s what I learned about proper brow shaping from Lucy at:
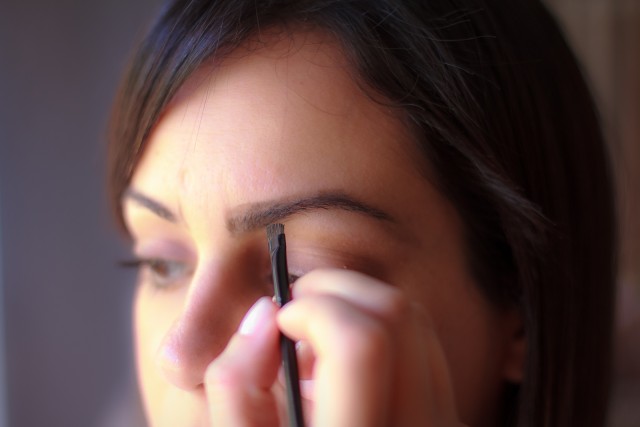
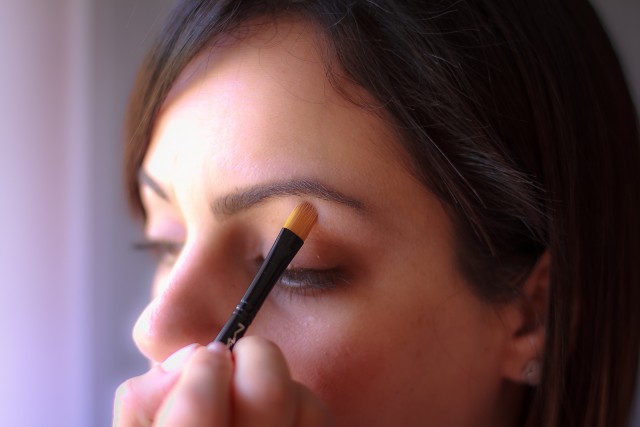
STEP 1: Determine where your brow should start, arch, and end. To properly measure, use this guide: From the inner corner of your eye (your tear duct) go straight up and that’s where your brow should start. From the tip of your nose diagonally to above your iris, that’s where your brow should arch. From the tip of your nose to the outer corner of your eye, that’s where your brow should end. Mark each point with your angle brush after dipping it in a brow powder that best matches your natural brow color.
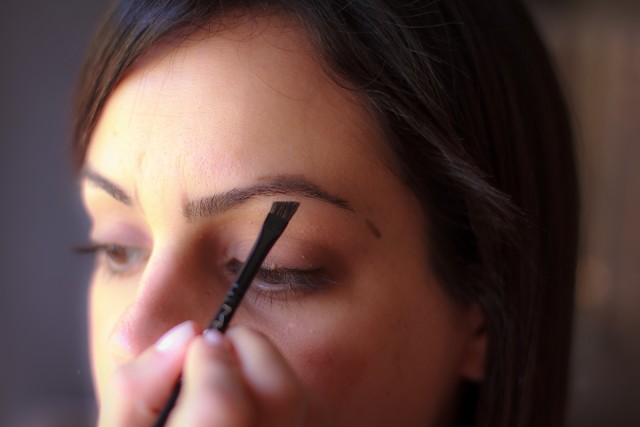
STEP 2: Use a brow fix pencil all over your brows. The wax will help the brow powder stay on all day.
STEP 3: Generously dip your angle brush in brow powder and start filling in the gaps. Connect those points you drew in starting with the first point and follow the lines, above and below your brow, until you come to the point at the end. You can be a little dramatic with your application at this point. It may look a little cartoon-y but you’ll fix that in the next step. Make sure you have a continuous line and shape, and that all holes and gaps are filled in. A good tip is to draw in hairs in the natural direction of your growth.

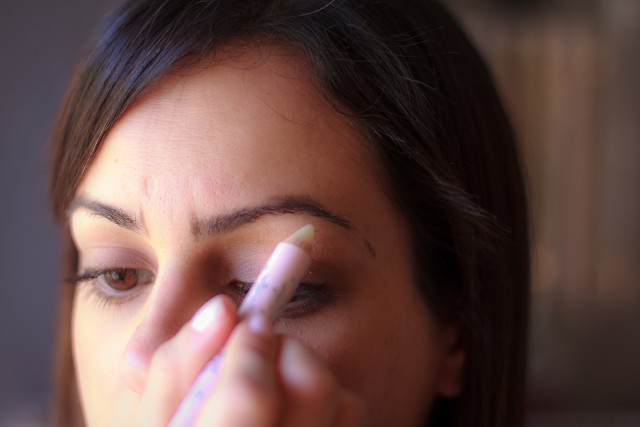
STEP 4: Using the highlighter pencil (e.l.f. concealer works well, too) draw around the shape of the brow and correct any lines that are too harsh or long. This is basically your eraser. You should have a smooth brow shape within the highlighted portion.
STEP 5: Using a concealer brush, blend until the highlighter or concealer is smooth and blended into your skin. Blend all around the eyebrow.
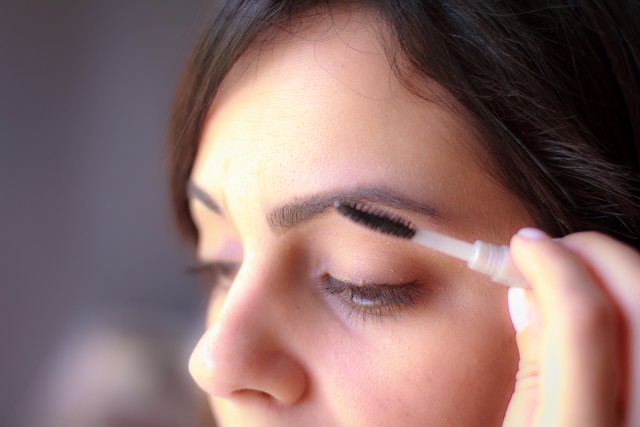
STEP 6: Using a clear brow gel, brush brows until they are set in the shape you’d like. Using a clear brow gel will help them stay in place all day. Using a tinted gel will make them a bit more dramatic. It’s all a matter of preference.

Voila! The thick brows I was born with minus the Frida Kahlo center junction.
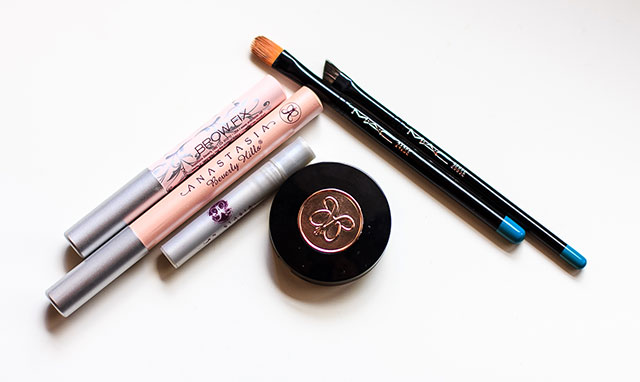
TOOLS: Anastasia Brow Fix, Anastasia Brow Powder, Anastasia Highlighter Pencil (or e.l.f. Concealer), MAC Concealer Brush, MAC Angle Brush, Anastasia Brow Gel. You can also get a full brow kit with everything you need from Anastasia Beverly Hills ($65).
Thanks so much to Lucy R. and Christie Pea Nail Spa & Boutique for taking the time to teach me how to care for my brows and properly shape them. While I’ll be leaving all the waxing to the experts due to too many previous misadventures, I’m excited to maintain them myself and keep them looking balanced.
Photography by Tony Espinoza.
3 thoughts on “Brow Tutorial”